NarratoAI 😎📽️
An all-in-one AI-powered tool for film commentary and automated video editing.🎬🎞️
📖 English | 简体中文
NarratoAI is an automated video narration tool that provides an all-in-one solution for script writing, automated video editing, voice-over, and subtitle generation, powered by LLM to enhance efficient content creation.
💬 Join the open source community to get project updates and the latest news.
Home
Video Review Interface

Modpack 📥
NarratoAI Modpack v0.1.2 is released 🚀
Hurry up and follow the WeChat public account [NarratoAI助手] and reply to the keyword [整合包] to get the latest download link! Give it a try!
Note:
- Currently only available for Windows, Mac version is in development, Linux version will be available in a future release.
Future Plans 🥳
- Windows Integration Pack Release
- Optimized the story generation process and improved the generation effect
- Support local large model MiniCPM-V
- Support local large model Qwen2-VL
- ...
System Requirements 📦
- Recommended minimum: CPU with 4 cores or more, 8GB RAM or more, GPU is not required
- Windows 10 or MacOS 11.0 or above
Quick Start 🚀
Apply for Google AI Studio Account
- Visit https://aistudio.google.com/app/prompts/new_chat to apply for an account.
- Click
Get API Keyto request an API Key. - Enter the obtained API Key into the
gemini_api_keysetting in theconfig.example.tomlfile.
Configure Proxy VPN
The method to configure VPN is not restricted, as long as you can access Google's network. Here, clash is used as an example.
-
Note the port of the clash service, usually
http://127.0.0.1:7890. -
If the port is not
7890, modify theVPN_PROXY_URLin thedocker-compose.ymlfile to your proxy address.environment: - "VPN_PROXY_URL=http://host.docker.internal:7890" # Change to your proxy port; host.docker.internal represents the IP of the physical machine. -
(Optional) Or modify the
proxysettings in theconfig.example.tomlfile.[proxy] ### Use a proxy to access the Pexels API ### Format: "http://<username>:<password>@<proxy>:<port>" ### Example: "http://user:pass@proxy:1234" ### Doc: https://requests.readthedocs.io/en/latest/user/advanced/#proxies http = "http://xx.xx.xx.xx:7890" https = "http://xx.xx.xx.xx:7890"
Docker Deployment 🐳
① clone project, Start Docker
git clone https://github.com/linyqh/NarratoAI.git
cd NarratoAI
docker-compose up
② Access the Web Interface
Open your browser and go to http://127.0.0.1:8501
③ Access the API Documentation
Open your browser and go to http://127.0.0.1:8080/docs or http://127.0.0.1:8080/redoc
Usage
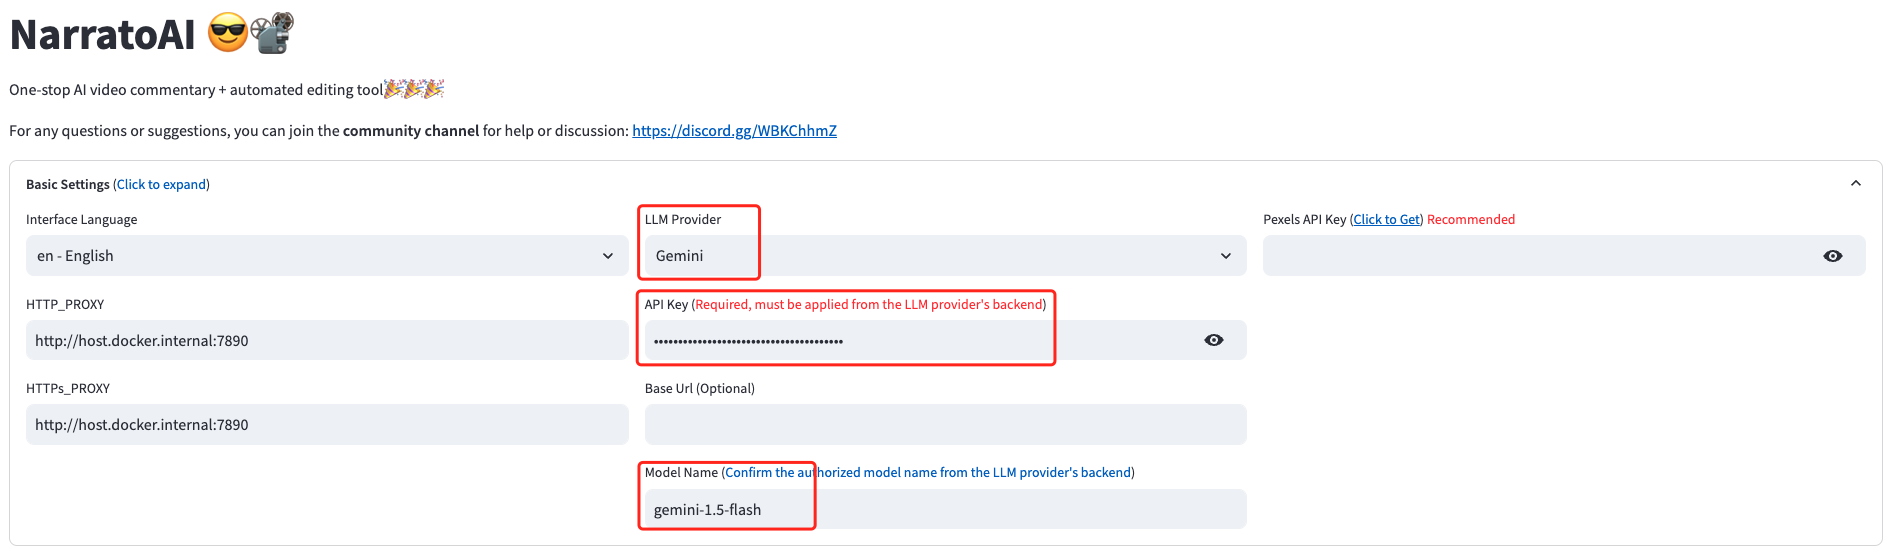
1. Basic Configuration, Select Model, Enter API Key, and Choose Model
Currently, only the
Geminimodel is supported. Other modes will be added in future updates. Contributions are welcome via PR to join in the development 🎉🎉🎉
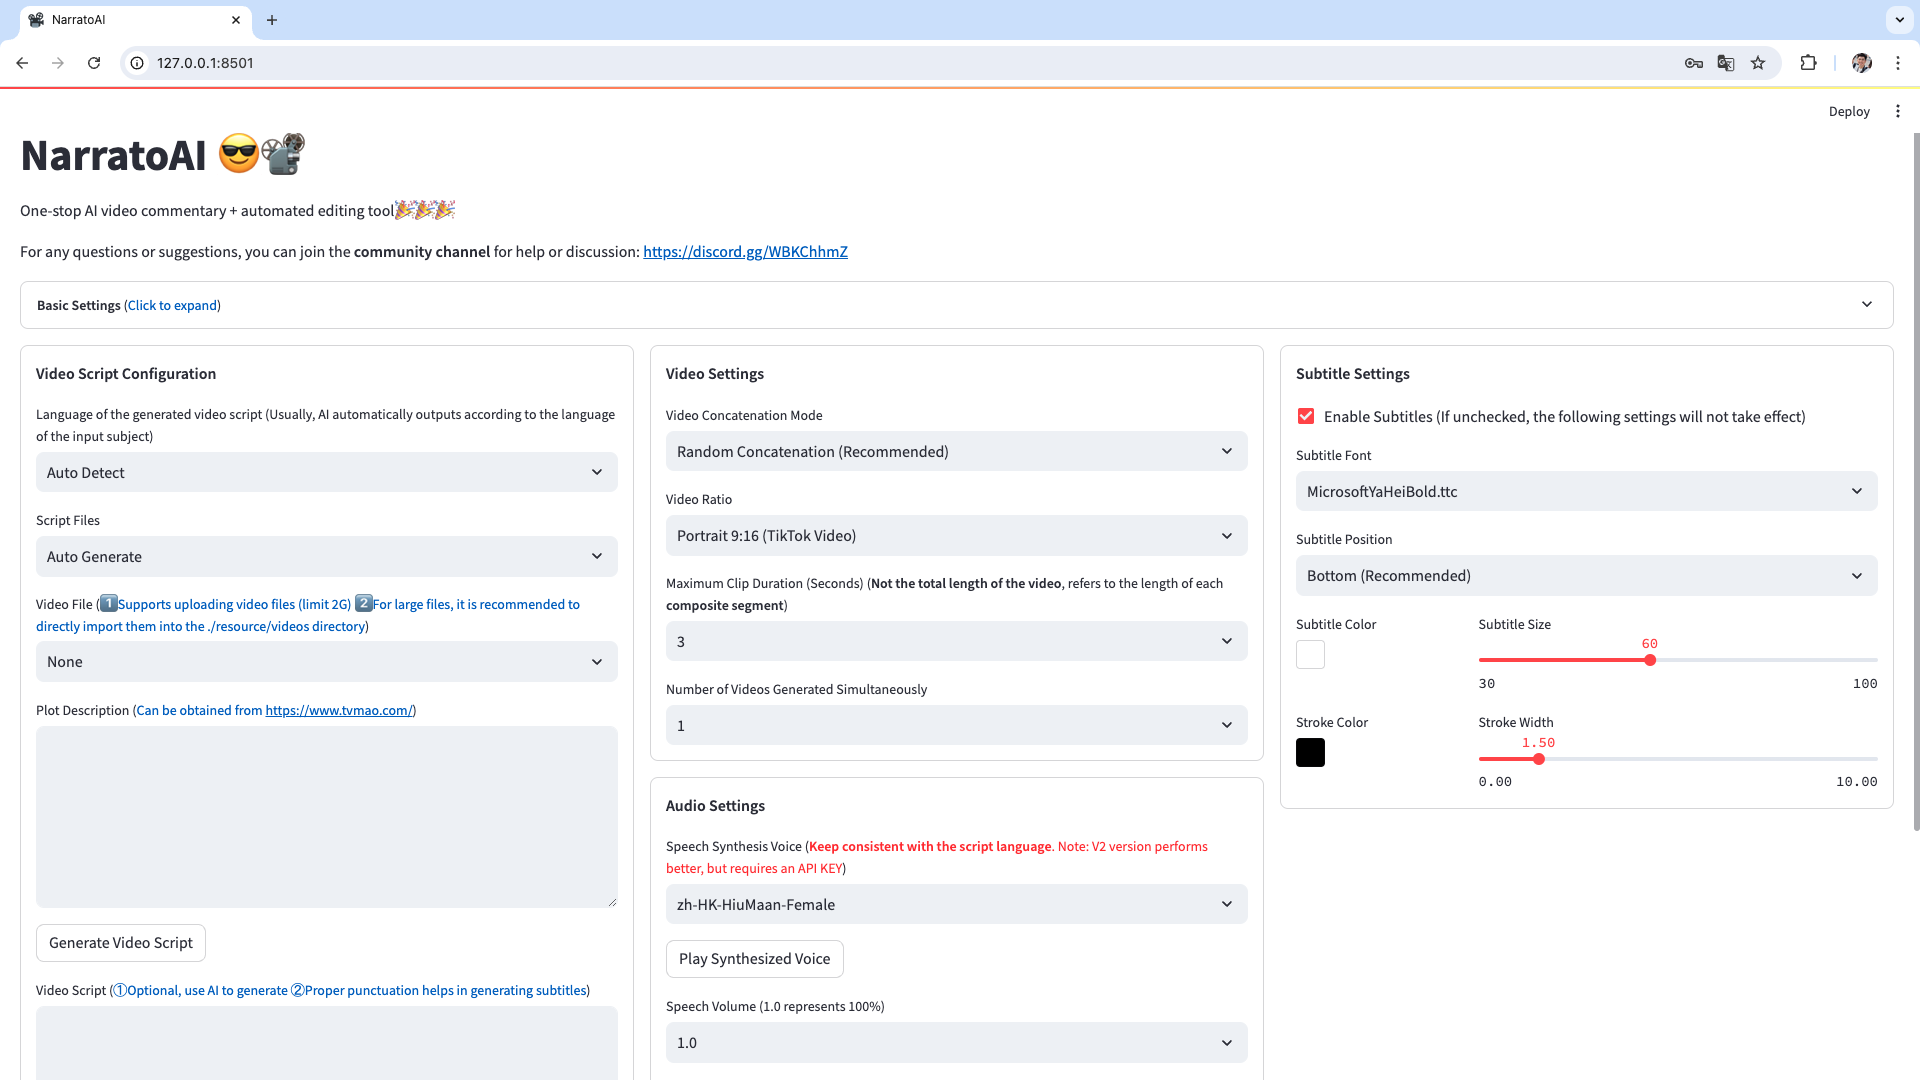
2. Select the Video for Narration and Click to Generate Video Script
A demo video is included in the platform. To use your own video, place the mp4 file in the
resource/videosdirectory and refresh your browser. Note: The filename can be anything, but it must not contain Chinese characters, special characters, spaces, backslashes, etc.

3. Save the Script and Start Editing
After saving the script, refresh the browser, and the newly generated
.jsonscript file will appear in the script file dropdown. Select the json file and video to start editing.

4. Review the Video; if there are segments that don't meet the rules, click to regenerate or manually edit them.

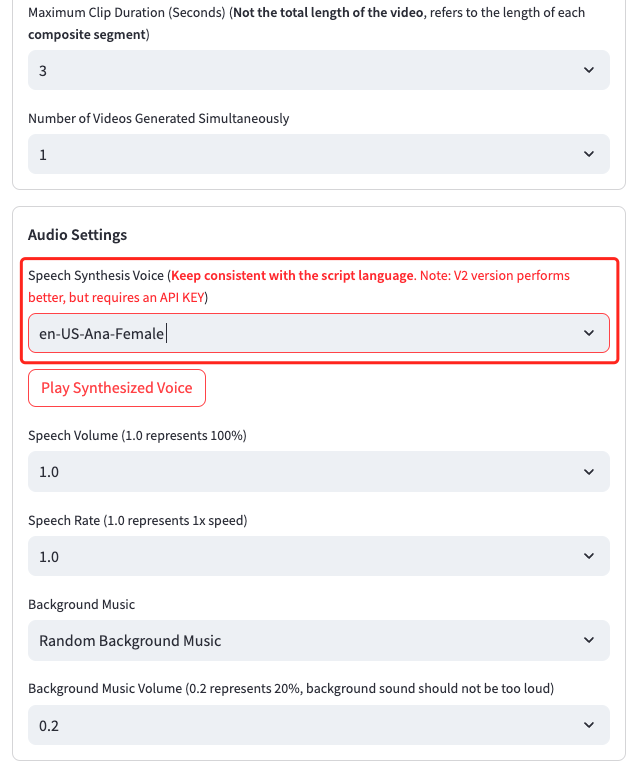
5. Configure Basic Video Parameters
6. Start Generating
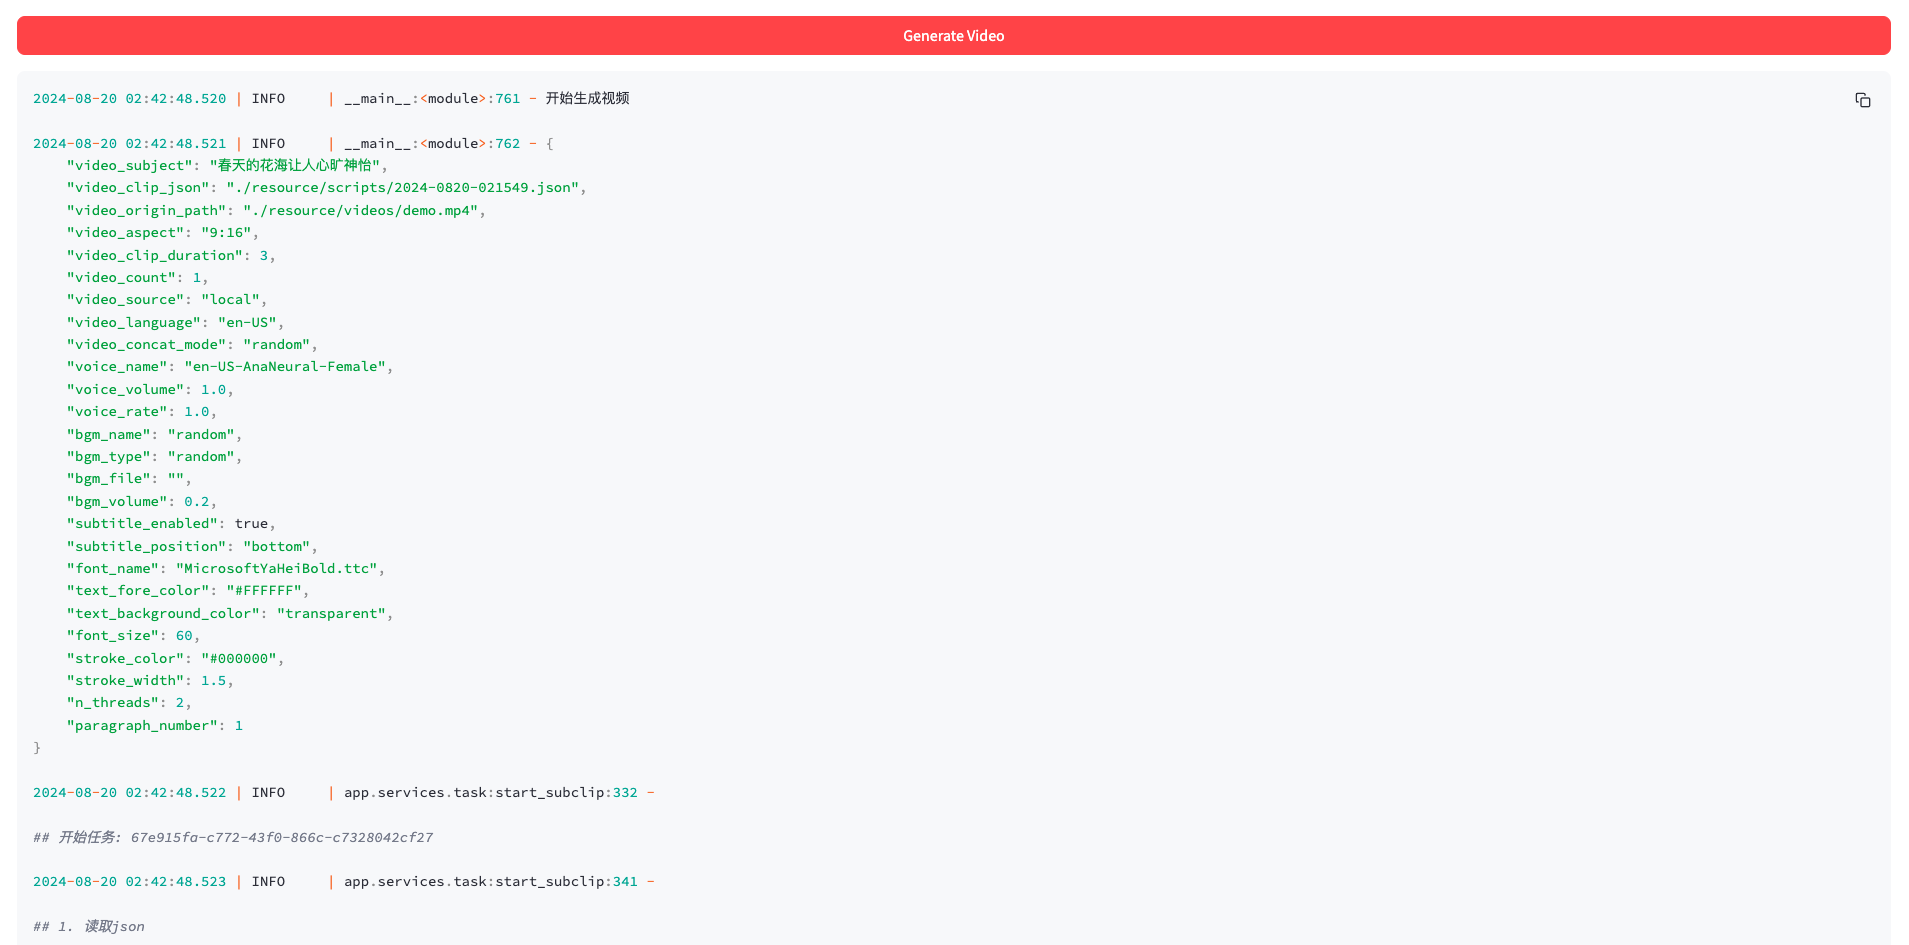
7. Video Generation Complete

Development 💻
- Install Dependencies
conda create -n narratoai python=3.10
conda activate narratoai
cd narratoai
pip install -r requirements.txt
- Install ImageMagick
Windows:
- Download https://imagemagick.org/archive/binaries/ImageMagick-7.1.1-36-Q16-x64-static.exe
- Install the downloaded ImageMagick, ensuring you do not change the installation path
- Update
imagemagick_pathin theconfig.tomlfile to your actual installation path (typicallyC:\Program Files\ImageMagick-7.1.1-Q16\magick.exe)
MacOS:
brew install imagemagick
Ubuntu
sudo apt-get install imagemagick
CentOS
sudo yum install ImageMagick
- initiate webui
streamlit run ./webui/webui.py --browser.serverAddress=127.0.0.1 --server.enableCORS=True --browser.gatherUsageStats=False
- Access http://127.0.0.1:8501
Feedback & Suggestions 📢
👏👏👏 You can submit issues or pull requests 🎉🎉🎉
💬Join the open source community exchange group
💬Add a mini-assistant
Reference Projects 📚
This project was refactored based on the above projects with the addition of video narration features. Thanks to the original authors for their open-source spirit 🥳🥳🥳
License 📝
Click to view the LICENSE file