NarratoAI 😎📽️
一站式 AI 影视解说+自动化剪辑工具🎬🎞️
[//]: # (

)
NarratoAI 是一个自动化影视解说工具,基于LLM实现文案撰写、自动化视频剪辑、配音和字幕生成的一站式流程,助力高效内容创作。
[](https://github.com/linyqh/NarratoAI)
[](https://github.com/linyqh/NarratoAI/blob/main/LICENSE)
[](https://github.com/linyqh/NarratoAI/issues)
[](https://github.com/linyqh/NarratoAI/stargazers)
💬 加入开源社区,获取项目动态和最新资讯。
首页

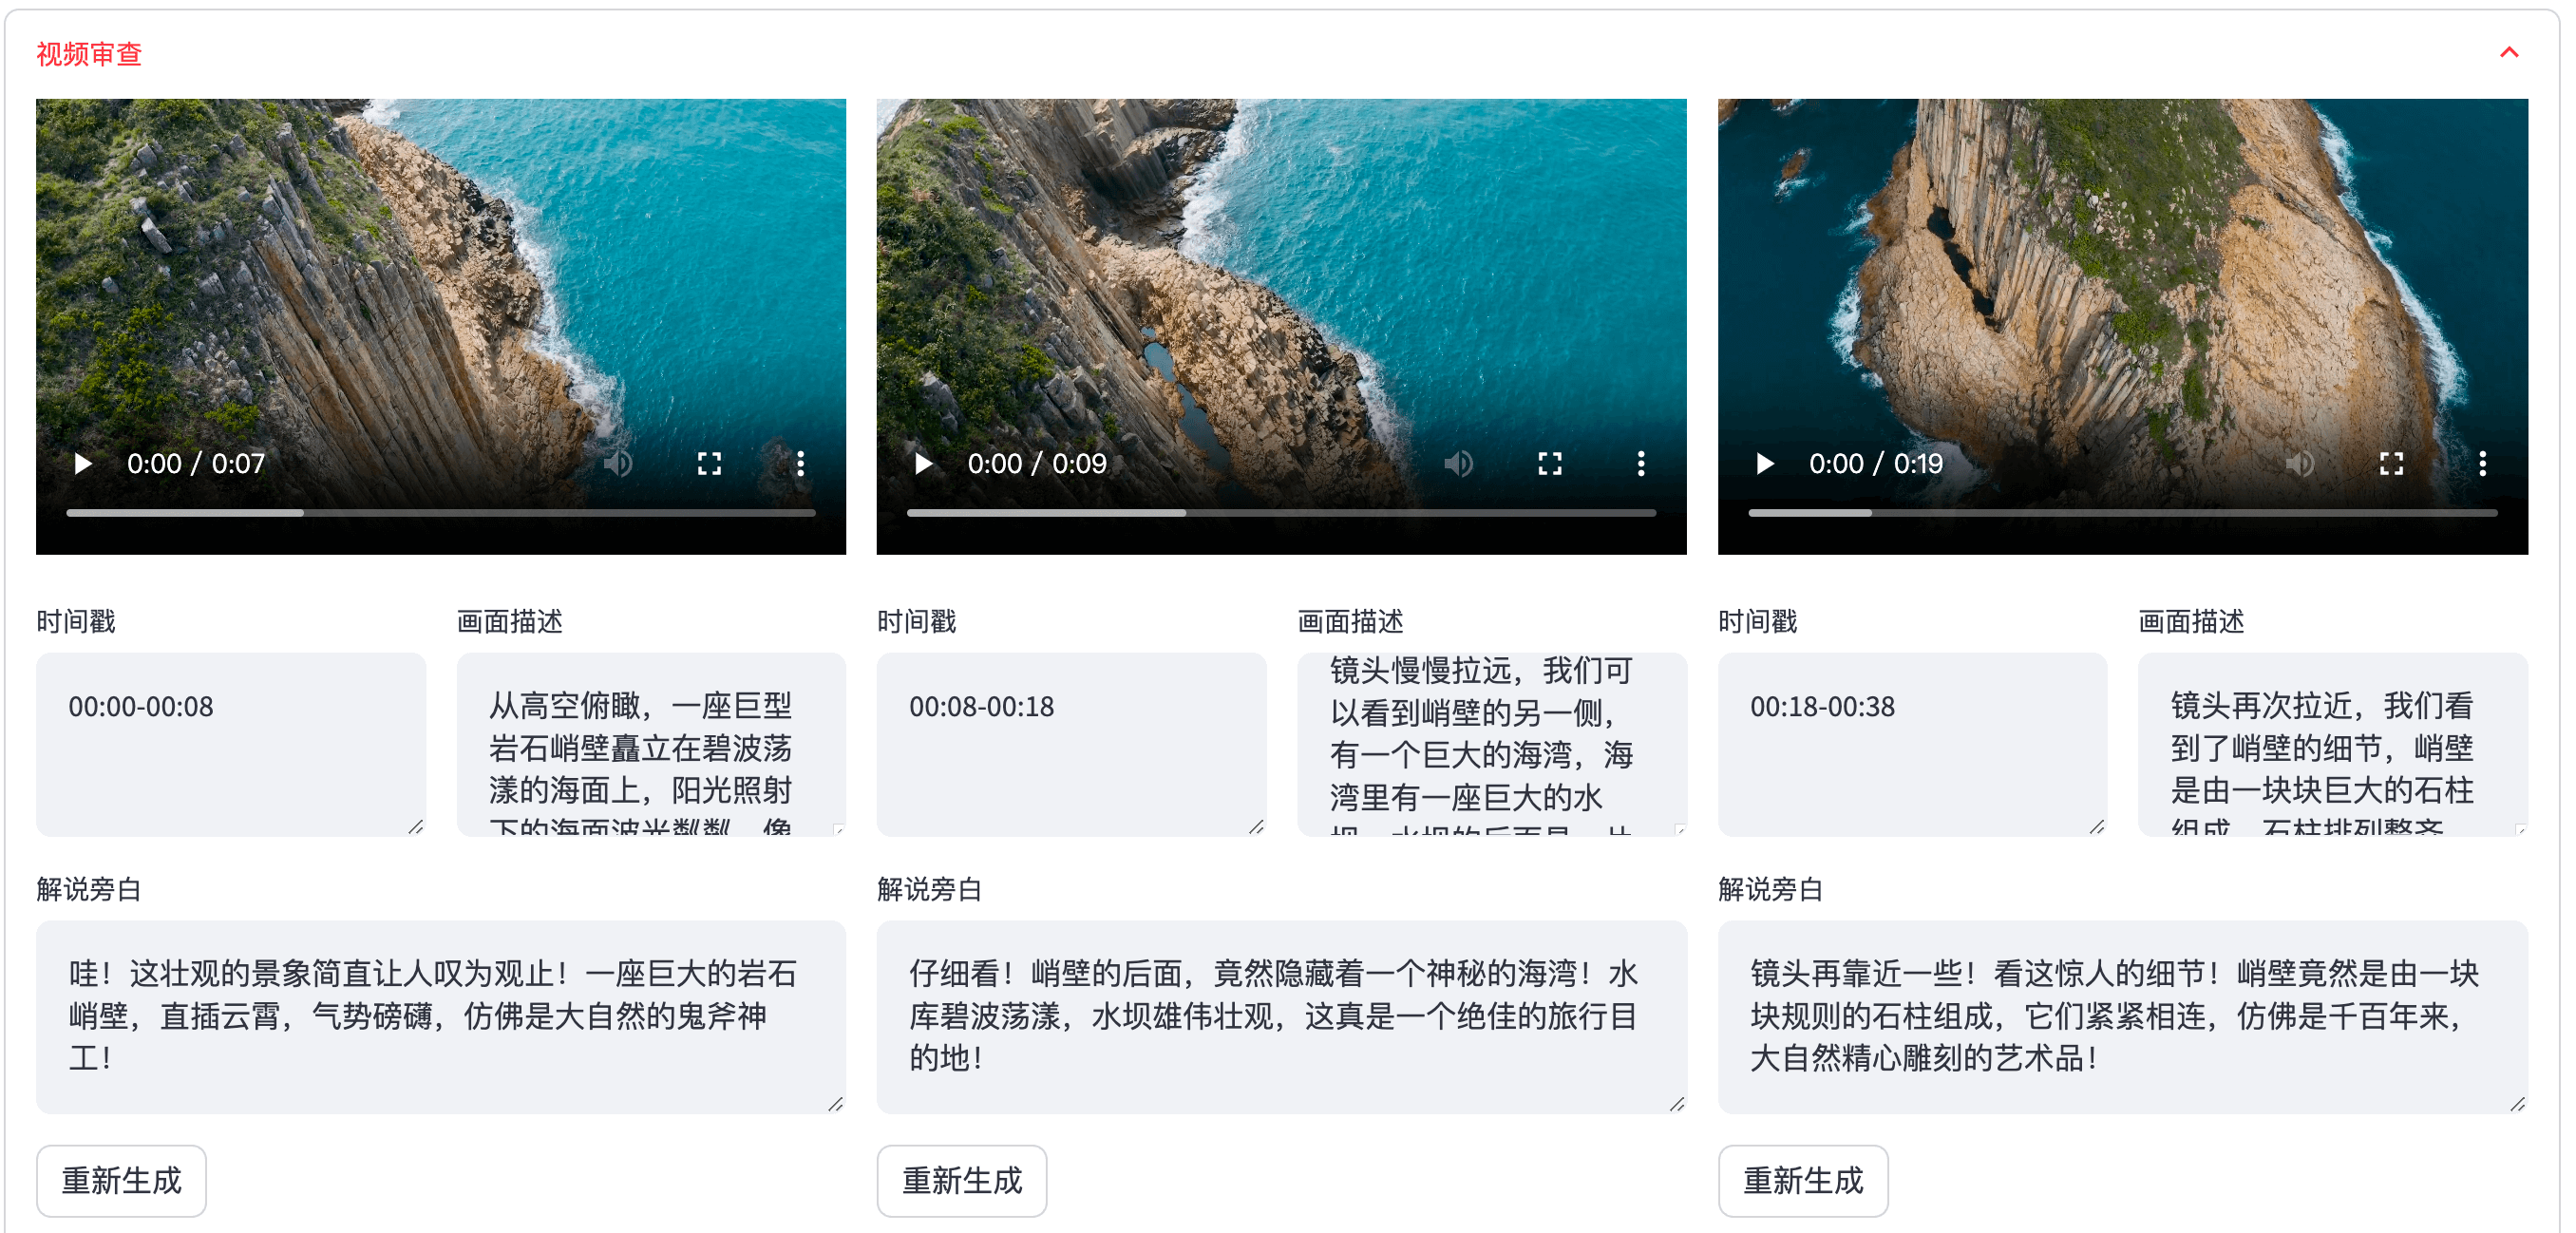
视频审查界面

## 未来计划 🥳
- [x] windows 整合包发布
- [ ] 优化剧情生成流程,提升生成效果
- [ ] 支持本地大模型 MiniCPM-V
- [ ] 支持本地大模型 Qwen2-VL
- [ ] ...
## 配置要求 📦
- 建议最低 CPU 4核或以上,内存 8G 或以上,显卡非必须
- Windows 10 或 MacOS 11.0 以上系统
## 快速开始 🚀
### 1. 申请 Google AI studio 账号
1. 访问 https://aistudio.google.com/app/prompts/new_chat 申请账号
2. 点击 `Get API Key` 申请 API Key
3. 申请的 API Key 填入 `config.example.toml` 文件中的 `gemini_api_key` 配置
### 2. 配置 proxy VPN
> 配置vpn的方法不限,只要能正常访问 Google 网络即可,本文采用的是 chash
1. 记住 clash 服务的端口,一般为 `http://127.0.0.1:7890`
2. 若端口不为 `7890`,请修改 `docker-compose.yml` 文件中的 `VPN_PROXY_URL` 为你的代理地址
```yaml
environment:
- "VPN_PROXY_URL=http://host.docker.internal:7890" # 修改为你的代理端口;host.docker.internal表示物理机的IP
```
3. (可选)或者修改 `config.example.toml` 文件中的 `proxy` 配置
```toml
[proxy]
http = "http://xx.xx.xx.xx:7890"
https = "http://xx.xx.xx.xx:7890"
```
### 3. 使用【整合包】开始 📥 (适用与 Windows 用户)
**NarratoAI 整合包 v0.1.2 发布啦** 🎉🎉🎉
关注微信公众号【NarratoAI助手】,回复关键词【整合包】即可获取最新下载链接!快来试试吧!
注意事项:
- 当前仅提供 Windows 版本,Mac和Linux用户请使用 docker 启动。
### 4. 使用【docker】开始🐳 (适用与 Mac 和 Linux 用户)
#### ① 拉取项目,启动Docker
```shell
git clone https://github.com/linyqh/NarratoAI.git
cd NarratoAI
docker-compose up
```
#### ② 访问Web界面
打开浏览器,访问 http://127.0.0.1:8501
#### ③ 访问API文档
打开浏览器,访问 http://127.0.0.1:8080/docs 或者 http://127.0.0.1:8080/redoc
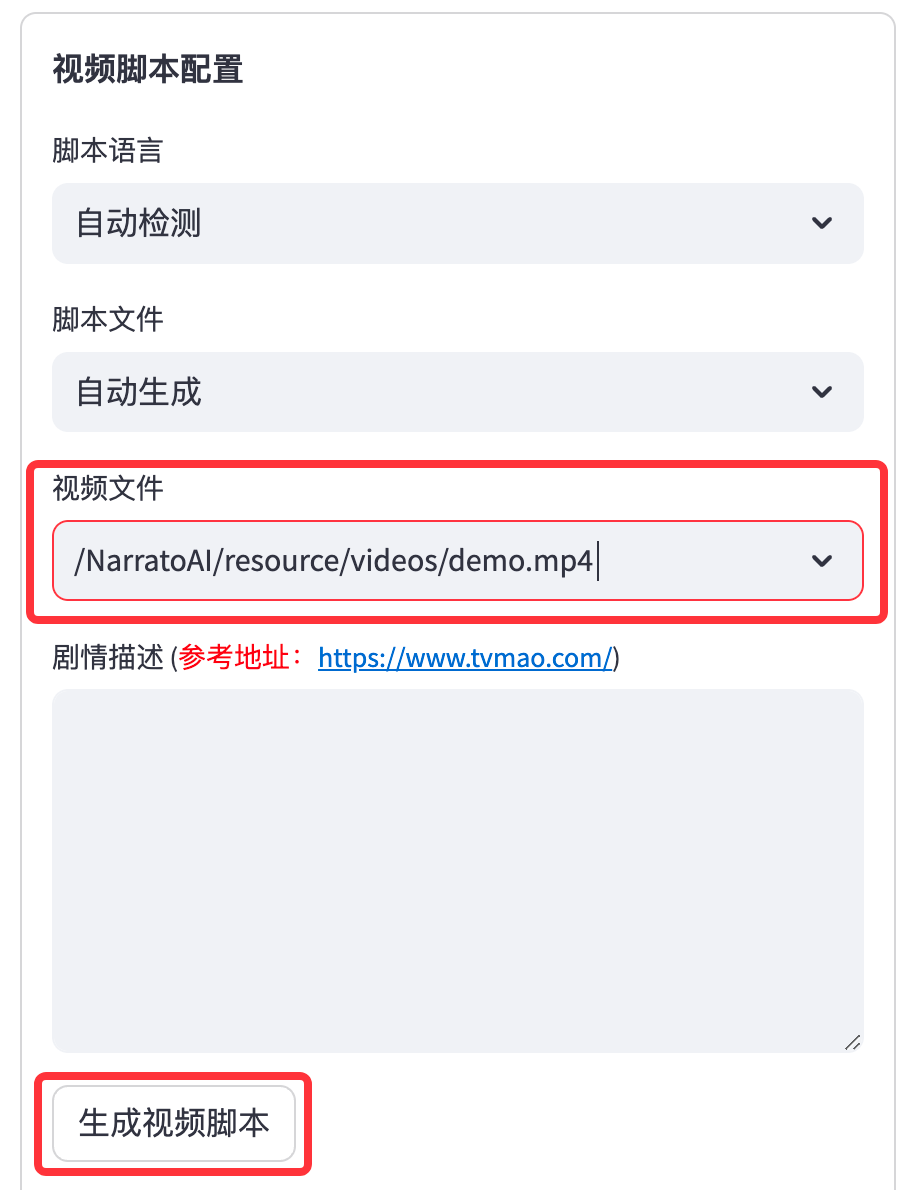
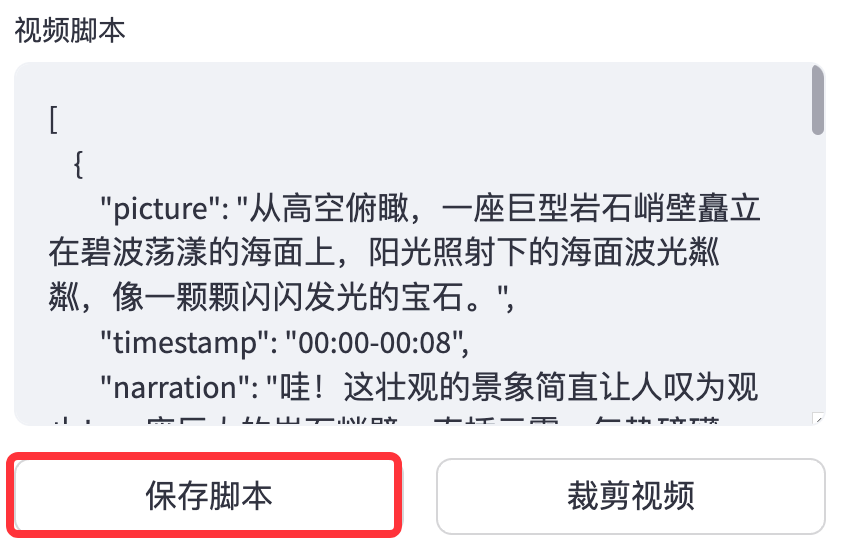
## 使用方法 🛠️
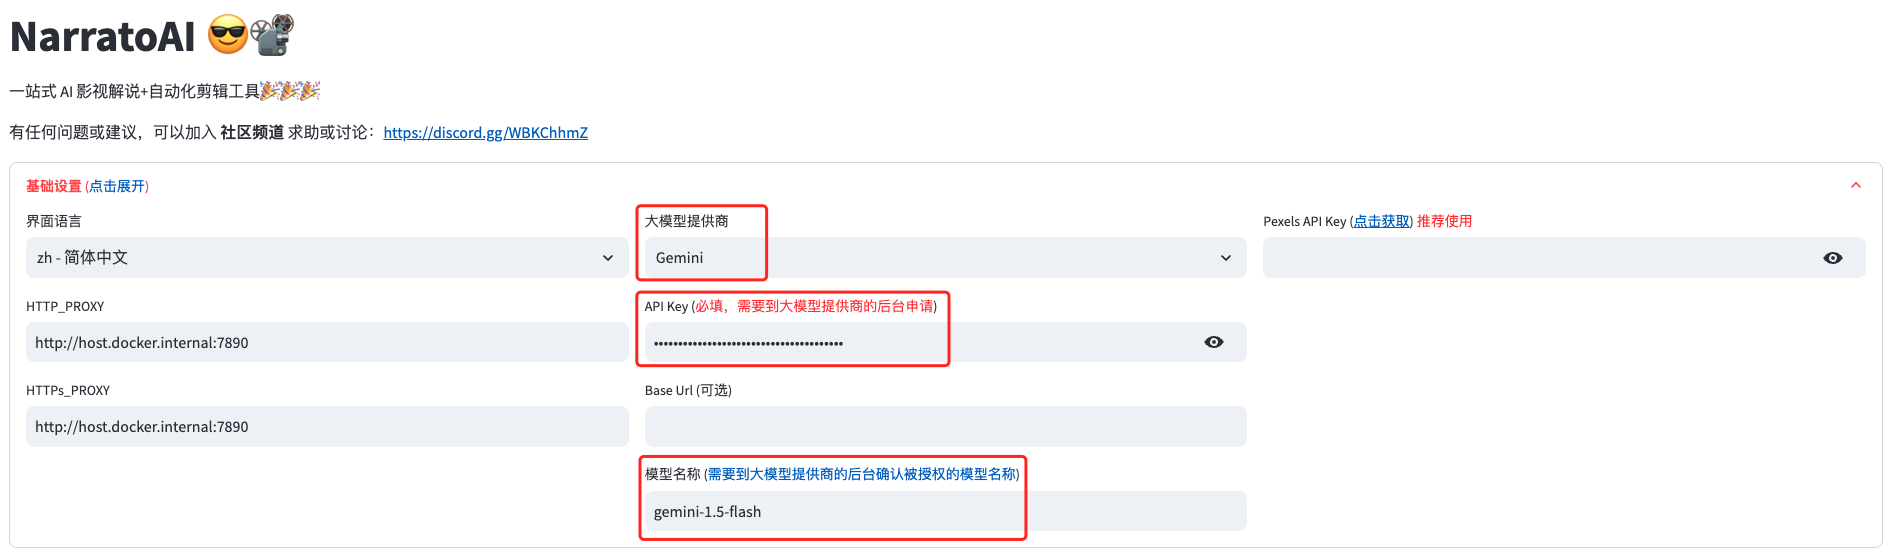
#### 1. 基础配置,选择模型,填入APIKey,选择模型
> 目前暂时只支持 `Gemini` 模型,其他模式待后续更新,欢迎大家提交 [PR](https://github.com/linyqh/NarratoAI/pulls),参与开发 🎉🎉🎉